Fried Chicken Breast Recipe

There’s nothing quite like the satisfying crunch of a perfectly Fried Chicken Breast straight from the skillet—it’s comfort food at its finest, evoking memories of family gatherings and lazy Sunday dinners. I remember the first time I nailed this recipe; the golden crust hiding that juicy, tender meat inside had everyone asking for seconds. If you’re craving homemade Fried Chicken Breast that’s crispy on the outside and flavorful throughout, you’ve come to the right place. In my experience, starting with a simple buttermilk soak makes all the difference in achieving that restaurant-quality Fried Chicken Breast without the hassle.
Let’s be honest, who doesn’t love a dish that’s easy to prepare yet feels indulgent? This Fried Chicken Breast recipe is designed for busy weeknights or when you want to impress without spending hours in the kitchen. I’ve tweaked it over the years to balance spices just right, ensuring every bite bursts with savory goodness. Stick around as I walk you through how to make your own Fried Chicken Breast that’s sure to become a staple in your home.
Key Takeaways:
- This Fried Chicken Breast delivers a crispy coating with juicy, tender meat inside for the ultimate comfort meal.
- Ready in under 30 minutes of active time, making it perfect for quick family dinners.
- Bursting with savory spices and herbs that elevate the classic flavor profile.
- Pat the chicken dry before coating for maximum crispiness every time.
- Store leftovers in the fridge for up to 3 days and reheat in the oven for best results.
Why You’ll Adore This Fried Chicken Breast
Crispy Perfection Every Bite: The secret to this Fried Chicken Breast lies in the double-dredge method, which creates an unbeatable crunch without sogginess. I’ve found that using a mix of flour and cornstarch keeps the coating light yet sturdy. You’ll love how it holds up even after resting on a wire rack.
Grab This Chef Knife Now - Almost Gone!

- Stays Razor-Sharp: Ice-hardened blade keeps its edge longer than ordinary knives
- Superior Grip Control: Unique finger hole design gives you perfect balance and safety
- Built to Last a Lifetime: Premium stainless steel blade with elegant beech wood handle
- ✓ Finally, a knife that stays sharp and feels comfortable in my hand
- ✓ Professional quality without the premium price tag
- ✓ Makes meal prep faster and more enjoyable
⏰ Only a few items left in stock - order soon
Juicy and Flavorful Inside: Buttermilk tenderizes the chicken beautifully, infusing it with tangy notes that pair perfectly with the spices. What I find interesting is how it locks in moisture, so no more dry bites—every piece of this Fried Chicken Breast stays succulent. It’s a game-changer for weeknight meals.
Quick and Effortless Prep: No need for fancy equipment; a simple skillet does the trick for frying up this delicious Fried Chicken Breast. Here’s the thing: you can have dinner on the table faster than ordering takeout. It’s forgiving for beginners too, with room to adjust spices to your taste.
Versatile for Any Meal: Whether sliced for salads or served whole with sides, this Fried Chicken Breast adapts seamlessly. In my kitchen, it’s a hit for meal prep lunches—reheats like a dream. Let’s be honest, its crowd-pleasing appeal makes it ideal for gatherings or solo indulgence.
Essential Ingredients for Fried Chicken Breast
Chicken Breasts: Opt for boneless, skinless chicken breasts about 6-8 ounces each to ensure even cooking in your Fried Chicken Breast. They’re lean yet flavorful, providing a blank canvas for the seasonings. In my experience, pounding them to uniform thickness prevents overcooking the outside while the inside stays moist. This step is crucial for that perfect bite every time.
Grab This Kitchen Scale Now — Best Precision Pick!

- Razor-Accurate Every Time: Dual-increment precision down to 0.1g — perfect for baking, meal prep, and portion control with g, oz, ml, and fl'oz modes.
- Smart Removable Bowl Design: Detachable bowl doubles as a protective case for compact storage. Tare function lets you weigh ingredients in any container with zero fuss.
- Built for Everyday Convenience: Auto-zero, tare function, low battery alert, overload indicator, and 2-minute auto-off to extend battery life — all in a sleek stainless steel build.
- ✓ "Perfect for baking — precise, lightweight, and stores easily without wasting counter space"
- ✓ "A game changer! Weighing ingredients is now way more accurate than measuring cups"
- ✓ "Love the 0.1g precision and backlight — best food scale I've owned. Highly recommend!"
⏰ Only a few items left in stock - order soon
Buttermilk: The tangy acidity in buttermilk works magic by breaking down proteins, resulting in tender Fried Chicken Breast. I always add a pinch of hot sauce to the soak for subtle heat that enhances the overall savoriness. It’s not just for marinating; it helps the coating adhere beautifully during frying. Without it, you’d miss out on that signature juiciness.
Flour and Spices: All-purpose flour mixed with paprika, garlic powder, salt, and pepper forms the crispy shell of this Fried Chicken Breast. These spices build layers of flavor that bloom when fried, creating an aromatic crust. What I love is how easy it is to customize—add cayenne for heat if you dare. This blend ensures your Fried Chicken Breast isn’t bland but bursts with taste.
How to Make Fried Chicken Breast
Prepare and Marinate the Chicken
Start by placing your chicken breasts in a large bowl and pouring over enough buttermilk to cover them completely, adding a dash of salt and pepper for extra flavor. Let it sit in the fridge for at least 30 minutes, but up to 4 hours if you have time—this marinade is key to making your Fried Chicken Breast incredibly tender. I always stir in a beaten egg at the end of marinating to help the coating stick better. The tangy soak not only tenderizes but infuses the meat with subtle richness that shines through after frying.
Coat for Crispiness
Remove the chicken from the buttermilk, letting excess drip off, then dredge each piece in a seasoned flour mixture of all-purpose flour, paprika, garlic powder, onion powder, salt, and pepper. Press the flour gently to create a thick, even layer that will fry up golden and crunchy. For extra crunch, dip back into the buttermilk and flour once more—double-dredging is a pro move I’ve sworn by for years. Set aside on a plate while your oil heats; this resting time helps the coating set beautifully.
Fry to Golden Perfection
Heat vegetable oil in a deep skillet to 350°F, then carefully add the coated chicken breasts, frying 6-8 minutes per side until they reach an internal temperature of 165°F and boast a deep golden hue. The sizzle you’ll hear is music to my ears, signaling that crispy Fried Chicken Breast is on its way. Use a slotted spoon to transfer to a wire rack over a baking sheet to drain—never paper towels, as they can steam the bottom. Let rest a few minutes; the juices redistribute for that mouthwatering tenderness inside.
Ingredients
- 4 boneless, skinless chicken breasts (about 1.5 lbs)
- 2 cups buttermilk
- 1 egg, beaten
- 2 cups all-purpose flour
- 1 tablespoon paprika
- 1 teaspoon garlic powder
- 1 teaspoon onion powder
- 1 teaspoon salt
- 1/2 teaspoon black pepper
- 1/4 teaspoon cayenne pepper (optional, for heat)
- Vegetable oil, for frying
Fried Chicken Breast Instructions
- In a large bowl, combine chicken breasts with buttermilk, salt, and pepper. Cover and refrigerate for 30 minutes to 4 hours.
- In a shallow dish, mix flour with paprika, garlic powder, onion powder, salt, pepper, and cayenne.
- Remove chicken from buttermilk, dip in beaten egg, then dredge in flour mixture. For extra crisp, repeat dredge.
- Heat 1/2 inch of oil in a skillet to 350°F. Fry chicken 6-8 minutes per side until golden and 165°F internal temp.
- Drain on a wire rack. Serve hot with your favorite sides.
Pro Tips for the Best Fried Chicken Breast
Oil Temperature is Key: Use a thermometer to maintain 350°F; too low and your Fried Chicken Breast turns greasy, too high and it burns.
Don’t Overcrowd the Pan: Fry in batches to keep the oil hot, ensuring even cooking and crispiness throughout.
Rest Before Slicing: Let your Fried Chicken Breast sit 5 minutes post-fry to lock in juices for maximum tenderness.
You Must Know
- This recipe yields about 4 servings, perfect for a family of four.
- Always use fresh oil for frying to avoid off-flavors in your Fried Chicken Breast.
- Chicken must reach 165°F internally for safe eating—don’t skip the thermometer.
- Gluten-free flour works as a 1:1 sub for a allergy-friendly version.
How to Store Fried Chicken Breast
To keep your Fried Chicken Breast fresh, let it cool completely before transferring to an airtight container in the fridge, where it lasts up to 3 days. For longer storage, freeze portions in freezer bags for up to 2 months—thaw overnight in the fridge before reheating. The best way to reheat is in a 350°F oven for 10-15 minutes to restore crispiness without sogginess. I’ve found this method keeps the Fried Chicken Breast tasting almost as good as fresh.
Customizing Your Fried Chicken Breast
Feel free to swap buttermilk for yogurt or milk soured with lemon juice if that’s what you have on hand, maintaining the tenderness in your Fried Chicken Breast. Add herbs like thyme or rosemary to the flour mix for a herby twist, or go spicy with more cayenne. For a healthier spin, try baking the coated pieces at 425°F for 20-25 minutes, flipping halfway. If you’re into marinades, check out our 6 Simple Chicken Marinade Recipes for more ideas to elevate this Fried Chicken Breast.
What to Serve with Fried Chicken Breast
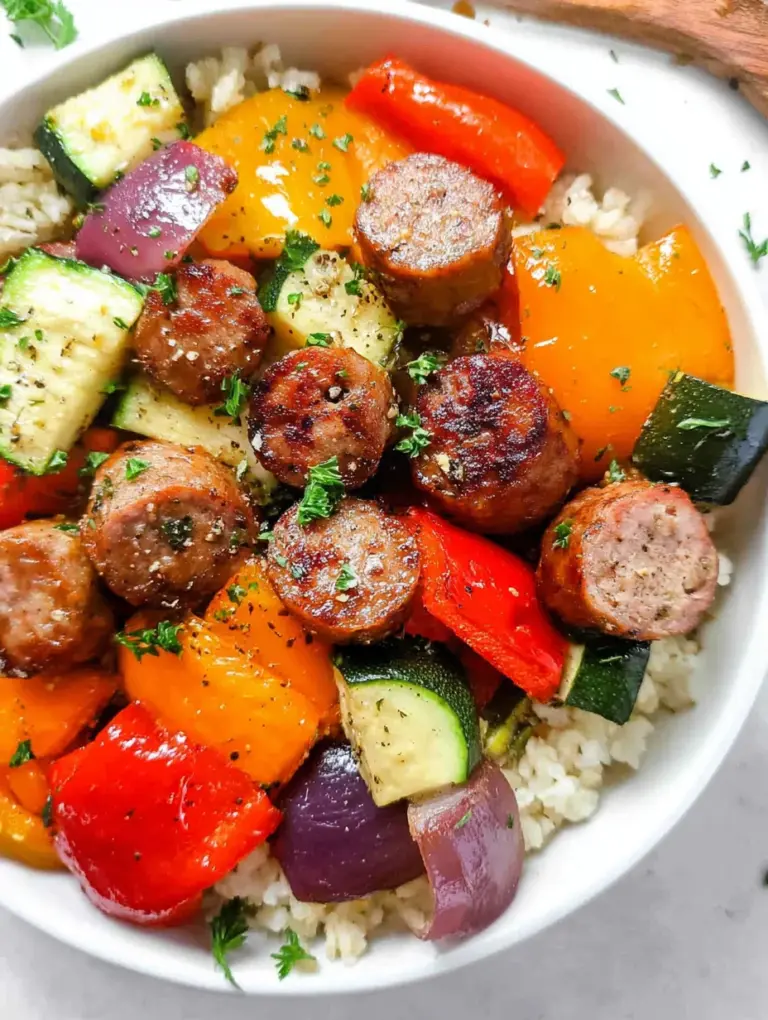
Pair your Fried Chicken Breast with classic Southern sides like creamy coleslaw and mashed potatoes for a hearty meal that soaks up every flavorful bite. A fresh green salad with vinaigrette adds crunch and balance, while cornbread brings a sweet contrast that’s always a winner in my book. Don’t forget iced tea or lemonade to refresh the palate. For a lighter option, try roasted veggies—inspired by our 10-Minute Air Fryer Chicken Sausage and Veggies Recipe.
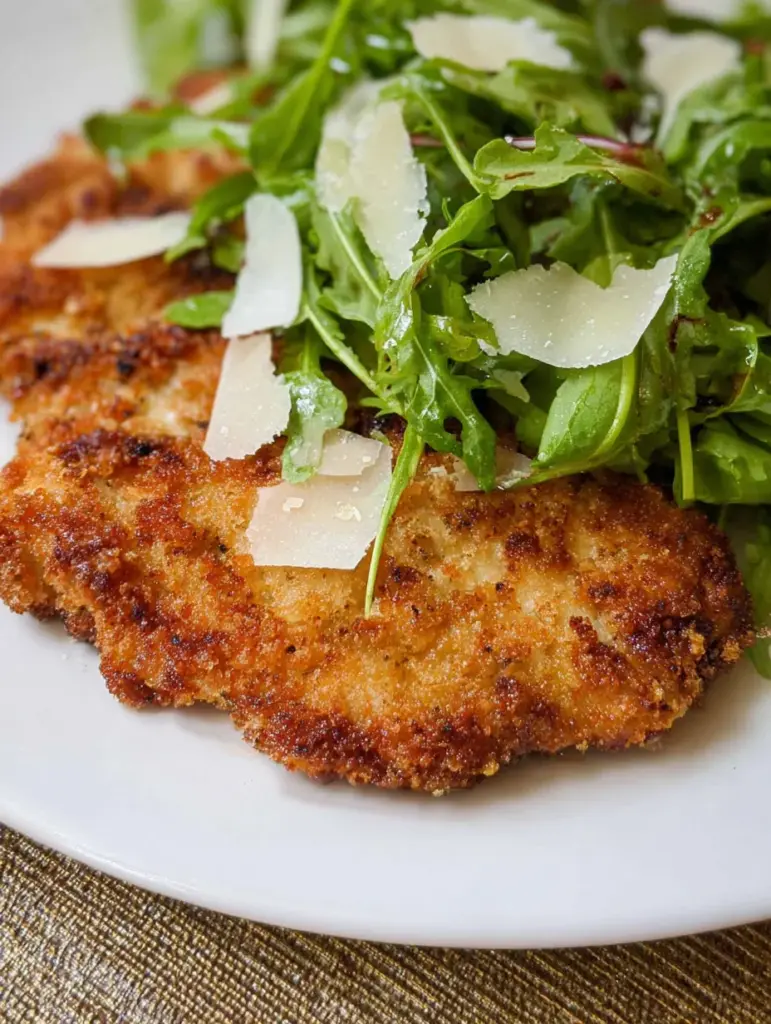
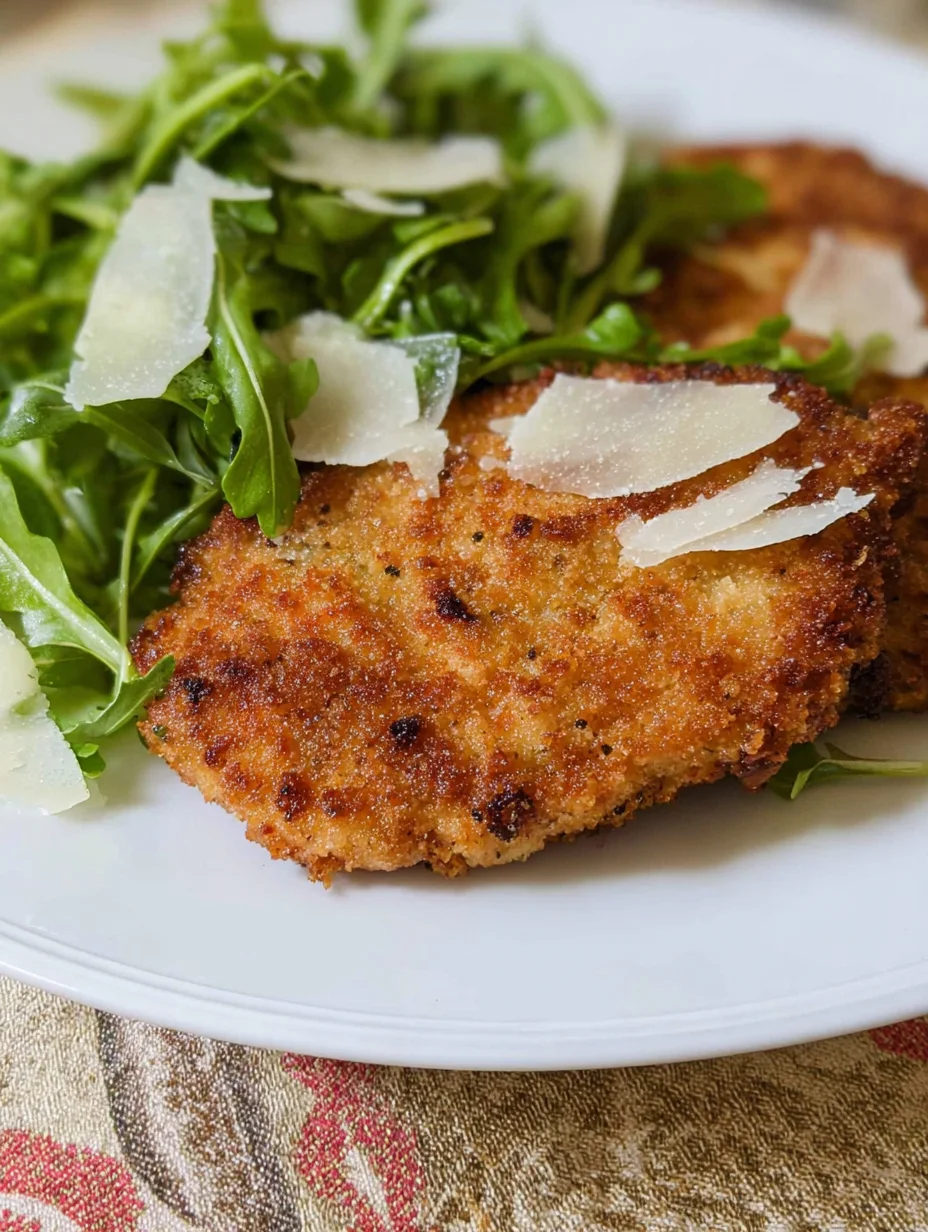
Fried Chicken Breast Recipe
This crispy fried chicken breast recipe is topped with arugula, shaved parmesan cheese, and a delicious lemon vinaigrette!
Timing
Recipe Details
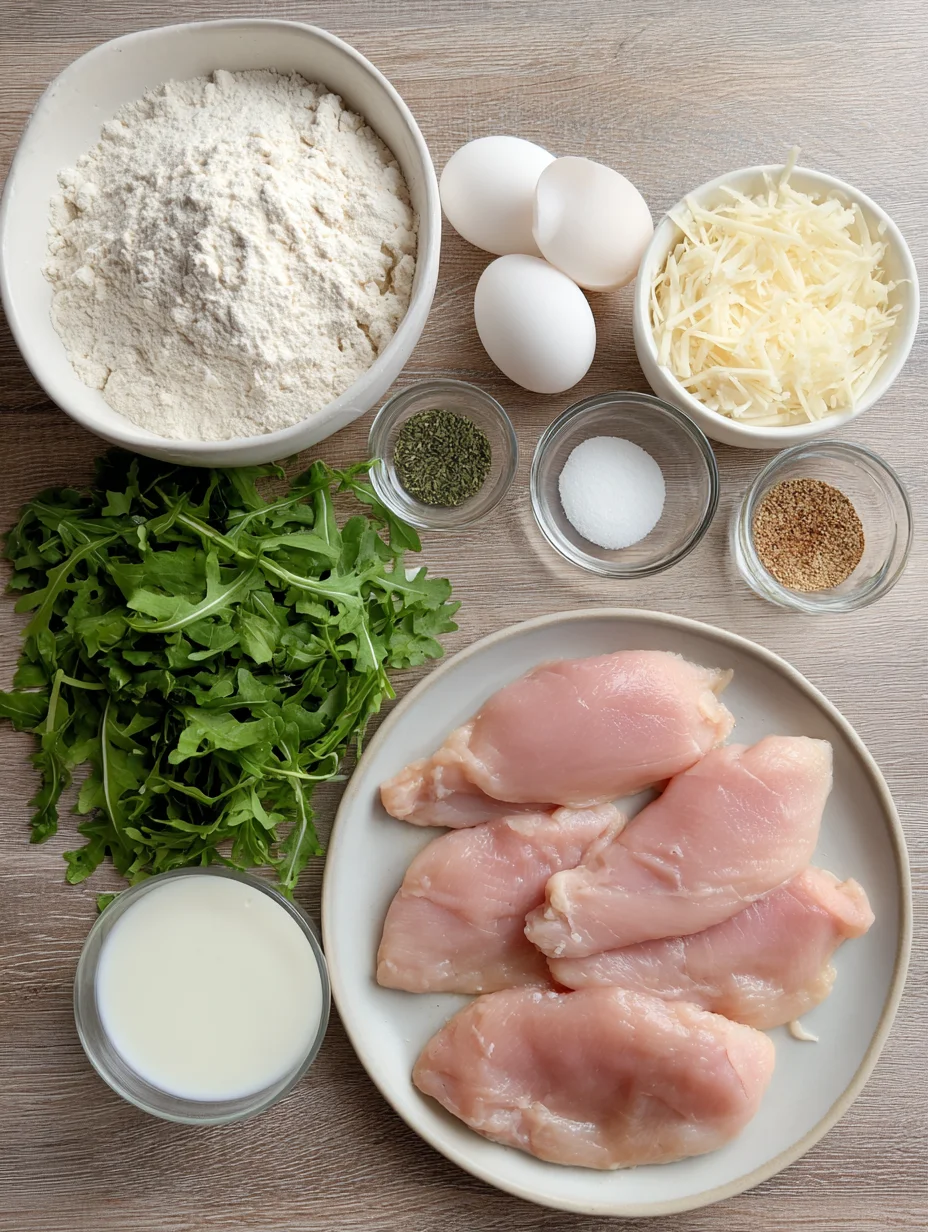
Ingredients
- 01 4 thin chicken breasts
- 02 1 pint buttermilk
- 03 ¾ cup all-purpose flour
- 04 ¾ cup panko bread crumbs
- 05 1 egg
- 06 2 teaspoon salt
- 07 1 teaspoon garlic powder
- 08 1 teaspoon pepper
- 09 4 cup baby arugula ((loosely packed))
- 10 4 tablespoon shaved parmesan cheese
- 11 2 tablespoon olive oil
- 12 2 tablespoon butter
- 13 2 tablespoon lemon juice
- 14 ¼ cup olive oil
- 15 salt and pepper (to taste)
FILED UNDER:
NUTRITION FACTS (PER SERVING)
Nutrition information is calculated using an ingredient database and should be considered an estimate. In cases where multiple ingredient alternatives are given, the first listed is calculated for nutrition. Garnishes and optional ingredients are not included.
Frequently Asked Questions About Fried Chicken Breast
Can I make Fried Chicken Breast ahead of time?
Yes, you can marinate the chicken up to 24 hours in advance for even more flavor infusion. Just coat and fry right before serving to keep the crispiness intact. It’s great for party prep without last-minute stress.
How long does Fried Chicken Breast last in the fridge?
Your Fried Chicken Breast stays good for 3-4 days when stored properly in an airtight container. Beyond that, freeze it to extend freshness. Always reheat to 165°F for safety.
Is Fried Chicken Breast healthy?
While indulgent, using lean breasts and minimal oil makes it balanced—pair with veggies for a nutritious meal. Bake instead of fry for a lighter take on this delicious Fried Chicken Breast. Moderation is key to enjoying it guilt-free.
Can I use chicken tenders for this recipe?
Absolutely, chicken tenders fry up quicker, about 4-5 minutes per side, and work perfectly in place of full breasts for your Fried Chicken Breast. Adjust cooking time to avoid overcooking. See our Air Fryer Chicken Skewers Recipe for similar quick-cook ideas.
What’s the best oil for frying Fried Chicken Breast?
Vegetable or canola oil with high smoke points are ideal for crisp results without burning. Peanut oil adds a nutty flavor if you like. Aim for neutral oils to let the seasonings shine in your Fried Chicken Breast.
How do I make Fried Chicken Breast extra crispy?
Double-dredge in the flour mixture and ensure your oil is at the right temperature for that shatteringly crisp coating on the Fried Chicken Breast. Draining on a wire rack prevents steaming. A sprinkle of cornstarch in the flour boosts crunch too.
Can I air fry this Fried Chicken Breast?
Yes, spray the coated pieces with oil and air fry at 375°F for 15-20 minutes, flipping halfway. It mimics frying with less oil. Check out our Air Fryer Chicken Breast Recipe for more tips.
Is this recipe spicy?
The base is mildly seasoned, but add more cayenne or hot sauce in the marinade for heat. It’s customizable, so your Fried Chicken Breast can be as fiery or tame as you prefer. Taste the flour mix and adjust accordingly.
Final Thoughts
From the first sizzle in the pan to that last satisfying bite, this Fried Chicken Breast recipe captures everything we love about home cooking—simple, delicious, and full of heart. I’ve shared it with friends and family, and it always gets rave reviews, proving it’s a timeless winner. Give it a try tonight; you won’t regret diving into your own batch of crispy, juicy Fried Chicken Breast. Share your twists in the comments—I’d love to hear how it turns out!