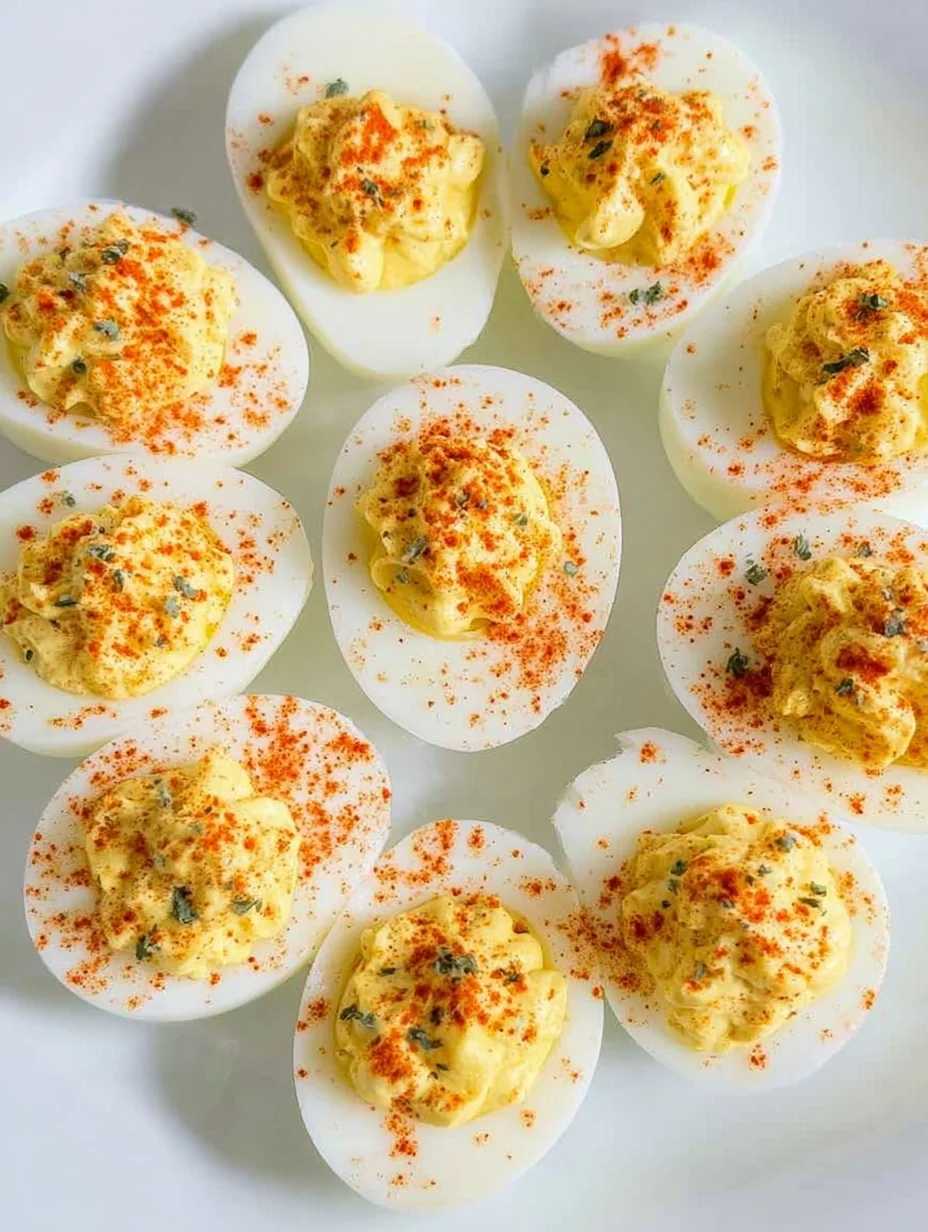
Classic Deviled Eggs
There’s something undeniably comforting about Classic Deviled Eggs at any gathering—think family barbecues or holiday potlucks where these little bites disappear faster than you can say “pass the plate.” I’ve always loved how they bring back memories of my grandma’s kitchen, where the tangy, creamy filling was the star of every appetizer spread. If you’re looking for an easy way to impress without spending hours, this Classic Deviled Eggs recipe is your go-to—simple ingredients, foolproof steps, and that classic flavor everyone craves.
In my experience, making Classic Deviled Eggs from scratch elevates them beyond store-bought versions, adding a personal touch that’s hard to beat. Whether you’re a newbie in the kitchen or a seasoned cook, you’ll find joy in the process. Let’s dive into this timeless recipe and get you whipping up a batch that’ll have folks asking for seconds!
Key Takeaways:
- Classic Deviled Eggs are a versatile appetizer perfect for parties, holidays, or quick snacks.
- This recipe comes together in under 30 minutes, making it ideal for busy weeknights or last-minute gatherings.
- The creamy, tangy filling delivers bold flavors that balance richness with a hint of spice.
- Start with room-temperature ingredients for smoother mixing and use a piping bag for professional presentation.
- Store in the fridge for up to 3 days; they’re even better made ahead for flavor melding.
Why You’ll Adore This Classic Deviled Eggs
Effortless Preparation: These Classic Deviled Eggs require minimal ingredients and steps, so you can focus on enjoying the party instead of slaving in the kitchen. I’ve made them countless times for crowds, and they never fail to be a hit without much fuss. It’s that simplicity that keeps me coming back.
Grab This Chef Knife Now - Almost Gone!

- Stays Razor-Sharp: Ice-hardened blade keeps its edge longer than ordinary knives
- Superior Grip Control: Unique finger hole design gives you perfect balance and safety
- Built to Last a Lifetime: Premium stainless steel blade with elegant beech wood handle
- ✓ Finally, a knife that stays sharp and feels comfortable in my hand
- ✓ Professional quality without the premium price tag
- ✓ Makes meal prep faster and more enjoyable
⏰ Only a few items left in stock - order soon
Timeless Appeal: Nothing beats the nostalgic taste of homemade Classic Deviled Eggs—creamy, zesty, and just a touch addictive. They’re like a hug from your favorite family recipe, bringing smiles to faces young and old. Let’s be honest, who can resist popping one in their mouth?
Customizable Fun: While the base is perfection, you can tweak your Classic Deviled Eggs with add-ins like bacon or herbs for a personal twist. This flexibility makes them suitable for any dietary preference or flavor profile. In my experience, experimenting keeps things exciting.
Crowd-Pleasing Versatility: Serve these at brunches, picnics, or dinners, and watch them vanish. Their bite-sized nature makes them shareable and mess-free, perfect for mingling. You’ll love how they pair with so many dishes on our site, like this quiche recipe.
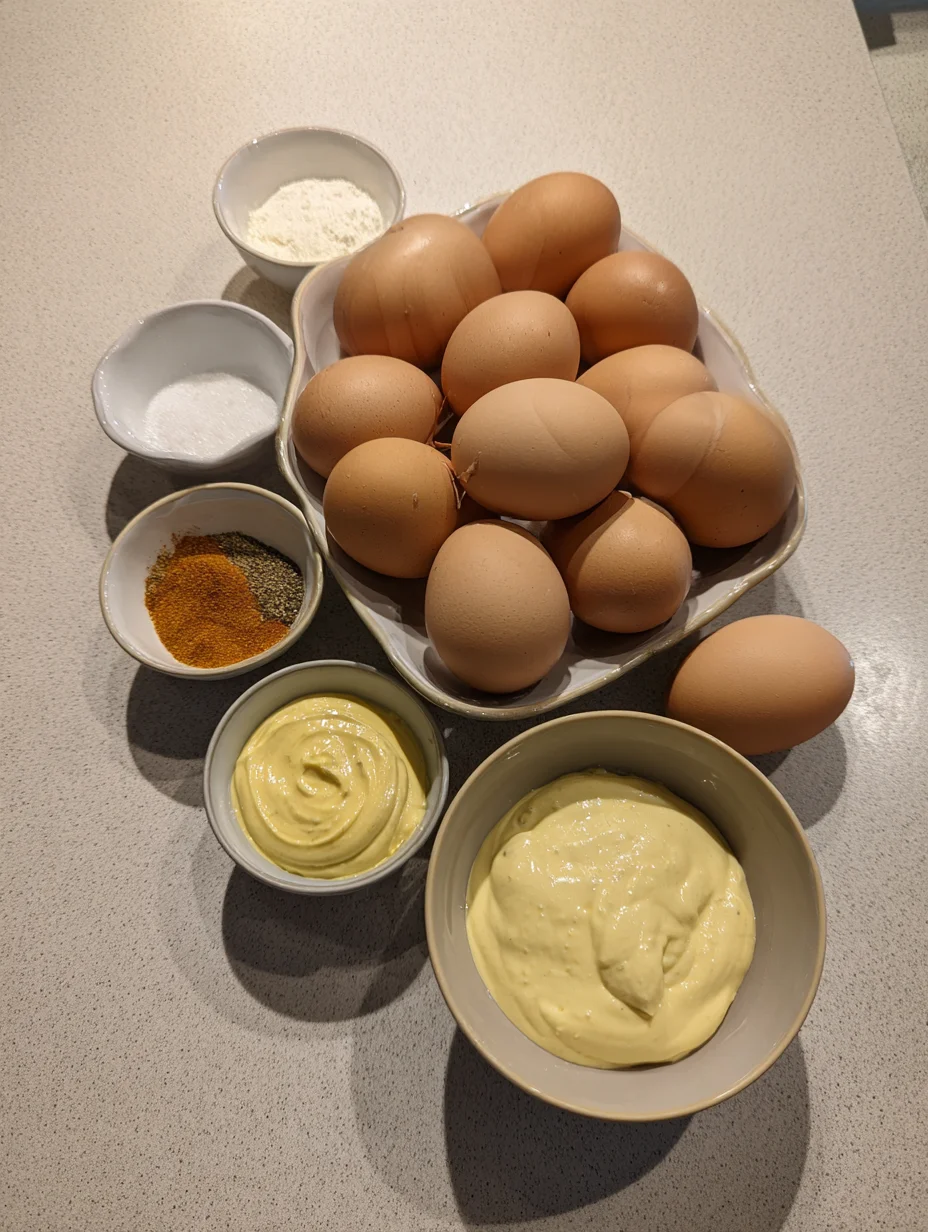
Essential Ingredients for Classic Deviled Eggs
Large Eggs: The foundation of Classic Deviled Eggs, fresh large eggs provide the perfect vessel with their firm whites and creamy yolks. I always opt for cage-free for better flavor and ethics, ensuring they peel smoothly after boiling. They contribute that signature texture—crisp outside, velvety inside—that makes these appetizers irresistible. Without quality eggs, your Classic Deviled Eggs just wouldn’t be the same.
Grab This Kitchen Scale Now — Best Precision Pick!

- Razor-Accurate Every Time: Dual-increment precision down to 0.1g — perfect for baking, meal prep, and portion control with g, oz, ml, and fl'oz modes.
- Smart Removable Bowl Design: Detachable bowl doubles as a protective case for compact storage. Tare function lets you weigh ingredients in any container with zero fuss.
- Built for Everyday Convenience: Auto-zero, tare function, low battery alert, overload indicator, and 2-minute auto-off to extend battery life — all in a sleek stainless steel build.
- ✓ "Perfect for baking — precise, lightweight, and stores easily without wasting counter space"
- ✓ "A game changer! Weighing ingredients is now way more accurate than measuring cups"
- ✓ "Love the 0.1g precision and backlight — best food scale I've owned. Highly recommend!"
⏰ Only a few items left in stock - order soon
Mayonnaise: This creamy binder brings richness and smoothness to the filling, tying all flavors together in Classic Deviled Eggs. Full-fat works best in my book for that luxurious mouthfeel, but light versions can substitute if you’re watching calories. It’s the secret to that silky consistency we all love scooping out.
Dijon Mustard: Adding a sharp, tangy kick, Dijon mustard elevates the humble egg with its sophisticated zing in Classic Deviled Eggs. It cuts through the richness, balancing the mayo beautifully. A teaspoon or two is all it takes to transform ordinary yolks into something extraordinary.
How to Make Classic Deviled Eggs
Boil and Prepare the Eggs
Start by placing 12 large eggs in a saucepan and covering them with cold water by about an inch—this ensures even cooking for your Classic Deviled Eggs. Bring to a rolling boil over medium-high heat, then cover, remove from the heat, and let sit for 12 minutes. The anticipation builds as they cool in an ice bath, making peeling a breeze and revealing those perfect yellow centers. I’ve found this method prevents any green rings around the yolks, keeping everything looking fresh and appetizing.
Mix the Creamy Filling
Once peeled and halved, gently scoop out the yolks into a bowl, mashing them with a fork until crumbly and smooth. Stir in 1/2 cup mayonnaise, 2 teaspoons Dijon mustard, 1 tablespoon sweet pickle relish, a dash of salt, pepper, and a pinch of paprika for that classic depth. The mixture should come together creamy yet pipeable—taste and adjust as needed, because getting it just right makes all the difference. Now, you might be thinking it’s too simple, but that’s the beauty of these timeless treats.
Assemble and Garnish
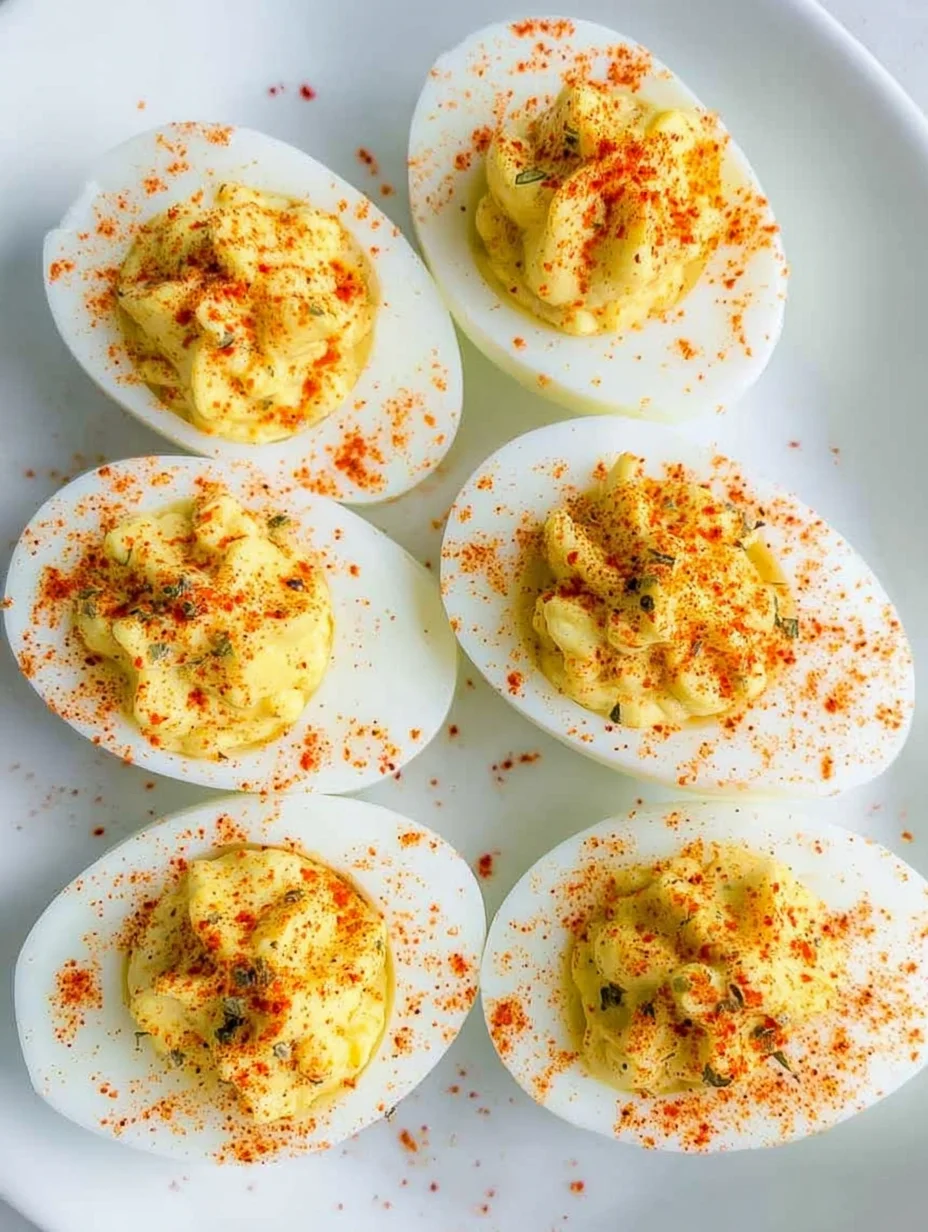
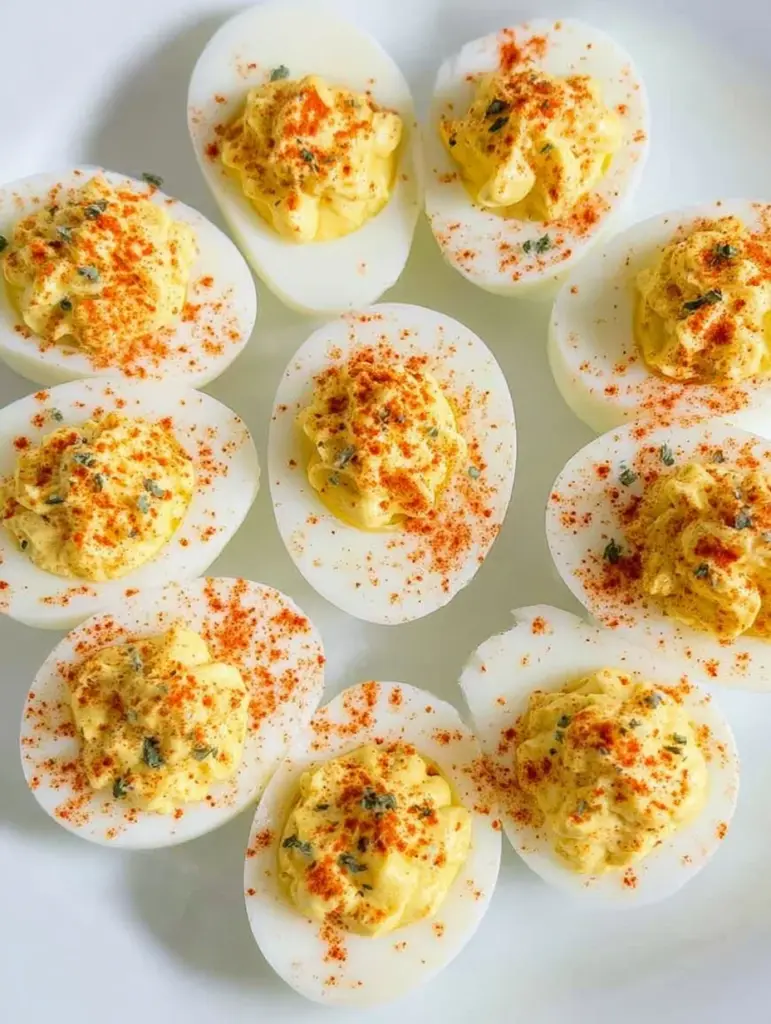
Spoon or pipe the filling back into the egg white halves, swirling for an elegant touch on your Classic Deviled Eggs. Sprinkle with extra paprika or chopped chives for a pop of color and flavor that draws eyes to the platter. If you want to get fancy, try adding a tiny shrimp on top for a seafood twist. Refrigerate for 30 minutes to let flavors meld, and you’re set for serving—easy, right?
Ingredients
- 12 large eggs
- 1/2 cup mayonnaise
- 2 teaspoons Dijon mustard
- 1 tablespoon sweet pickle relish
- 1/4 teaspoon salt
- 1/4 teaspoon black pepper
- Paprika, for garnish
- Optional: Chopped chives or bacon bits
Classic Deviled Eggs Instructions
- Place eggs in a saucepan, cover with cold water by 1 inch. Bring to a boil, then cover and let sit off heat for 12 minutes. Transfer to ice bath to cool.
- Peel eggs, slice in half lengthwise, and remove yolks to a bowl. Mash yolks with a fork.
- Mix in mayonnaise, mustard, relish, salt, and pepper until smooth. Adjust seasoning to taste.
- Spoon or pipe filling into egg whites. Garnish with paprika and chives.
- Chill for at least 30 minutes before serving. Enjoy your Classic Deviled Eggs!
Pro Tips for the Best Classic Deviled Eggs
Perfect Boiling Technique: Add a splash of vinegar to the boiling water to help eggs peel easier and prevent cracks—it’s a game-changer for flawless Classic Deviled Eggs.
Smooth Filling Secret: Let yolks cool completely before mashing to avoid lumps; use a sifter if needed for extra silkiness.
Presentation Boost: Invest in a piping bag for that pro look—it makes your Classic Deviled Eggs stand out on any platter.
You Must Know
- Hard-boiled eggs are best made ahead; the longer they sit, the easier they peel.
- Mayo can be swapped with Greek yogurt for a lighter, protein-packed version of Classic Deviled Eggs.
- These are naturally gluten-free, making them a safe choice for many diets.
- Avoid overcooking eggs to keep yolks vibrant yellow, not chalky.
How to Store Classic Deviled Eggs
To keep your Classic Deviled Eggs fresh, arrange them in a single layer in an airtight container lined with a paper towel to absorb moisture, and refrigerate for up to 3-5 days. If you’re planning ahead, assemble without garnish and add paprika just before serving to maintain vibrancy. They don’t freeze well due to the mayo, so enjoy them within the fridge window for best taste and texture.
Customizing Your Classic Deviled Eggs
For a smoky twist on Classic Deviled Eggs, mix in crumbled bacon or a dash of liquid smoke—it’s a favorite at our barbecues. If you’re going veggie, try avocado instead of mayo for creaminess, or add sriracha for heat; these variations keep things exciting without straying from the base. Check out our egg roll in a bowl recipe for more egg-inspired ideas that pair perfectly.
What to Serve with Classic Deviled Eggs
Pair your Classic Deviled Eggs with a crisp green salad or coleslaw for a refreshing contrast to their richness, or try them alongside grilled meats at a cookout. For a heartier spread, serve with crusty bread and a charcuterie board—think cheeses and cured meats that complement the tang. Wash them down with iced tea, lemonade, or a light white wine to keep the gathering lively and delicious.
Classic Deviled Eggs
This easy and classic deviled eggs recipe is a timeless appetizer or side dish with the perfect blend of creamy mayonnaise, mustard and the yolks of hard-boiled eggs with a sprinkle of paprika for color.
Timing
Recipe Details
Ingredients
- 01 12 large eggs
- 02 1/4 cup mayonnaise
- 03 1 tablespoon mustard
- 04 1/2 teaspoon black pepper
- 05 Pinch salt (of salt)
- 06 Paprika (optional garnish)
Instructions
In a medium pot, place the eggs with just enough water to cover them.
Bring to a boil over medium-high heat and boil for 3 minutes. Then cover and remove from heat and let sit for 15 minutes, covered.
Remove the eggs from pan and place in an ice water bath for at least 5 minutes. Then remove the shell from each egg and set aside on a paper towel.
Slice the eggs the long way and scoop the yolk out and place in medium sized bowl.
Mash the cooked egg yolks slightly with a fork until crumbly.
Add mayo, mustard, salt and pepper and stir until smooth.
Spoon the mixture into the egg halves and top with paprika.
FILED UNDER:
NUTRITION FACTS (PER SERVING)
Nutrition information is calculated using an ingredient database and should be considered an estimate. In cases where multiple ingredient alternatives are given, the first listed is calculated for nutrition. Garnishes and optional ingredients are not included.
Frequently Asked Questions About Classic Deviled Eggs
Can I make Classic Deviled Eggs ahead of time?
Absolutely, you can prepare Classic Deviled Eggs up to a day in advance—boil and fill the eggs, then cover and chill. This allows flavors to develop even more. Just add garnishes right before serving to keep them looking fresh.
How long does Classic Deviled Eggs last in the fridge?
Your Classic Deviled Eggs will stay good in the refrigerator for 3-5 days when stored properly in an airtight container. Beyond that, the texture might soften, so it’s best to enjoy them soon. Always check for any off smells before eating.
Are Classic Deviled Eggs keto-friendly?
Yes, Classic Deviled Eggs fit perfectly into a keto diet thanks to their high-fat, low-carb profile from eggs and mayo. Skip the relish if it’s sweetened, and you’re golden. They’re a fantastic snack for staying in ketosis.
What’s the best way to peel hard-boiled eggs for Classic Deviled Eggs?
After the ice bath, gently tap eggs on a hard surface and roll to crack the shell, then peel under cool running water—this makes it effortless for your Classic Deviled Eggs. Older eggs peel easier than super-fresh ones, so plan accordingly.
Can I use a different mustard in Classic Deviled Eggs?
Sure, while Dijon is classic, yellow mustard adds a milder tang, or whole-grain for texture in your Classic Deviled Eggs. Experiment to match your taste—it’s all about that personal zing. Our kebab recipe has great mustard tips too.
How do I fix runny filling in Classic Deviled Eggs?
If the filling for your Classic Deviled Eggs is too loose, add a bit more mashed yolk or a teaspoon of softened cream cheese to thicken it up. Chilling the mixture for 10 minutes also helps it firm before piping. Patience is key here!
Are there vegan options for Classic Deviled Eggs?
Yes, swap eggs for silken tofu halves and use vegan mayo for a plant-based take on Classic Deviled Eggs. Season similarly, and they’ll fool even meat-eaters. It’s a fun way to include everyone at the table.
Why do my Classic Deviled Eggs have green yolks?
Green yolks come from overcooking, so stick to the 12-minute timer for perfect Classic Deviled Eggs. The sulfur reaction happens with prolonged heat, but an ice bath stops it cold. Your next batch will be spot-on yellow.
Final Thoughts
From the first creamy bite to the last empty platter, this Classic Deviled Eggs recipe captures everything we love about simple, shareable food that brings people together. I’ve shared it at countless events, and it never disappoints—give it a try and see the magic for yourself. Head to the kitchen now, and let me know how your batch turns out; happy cooking!