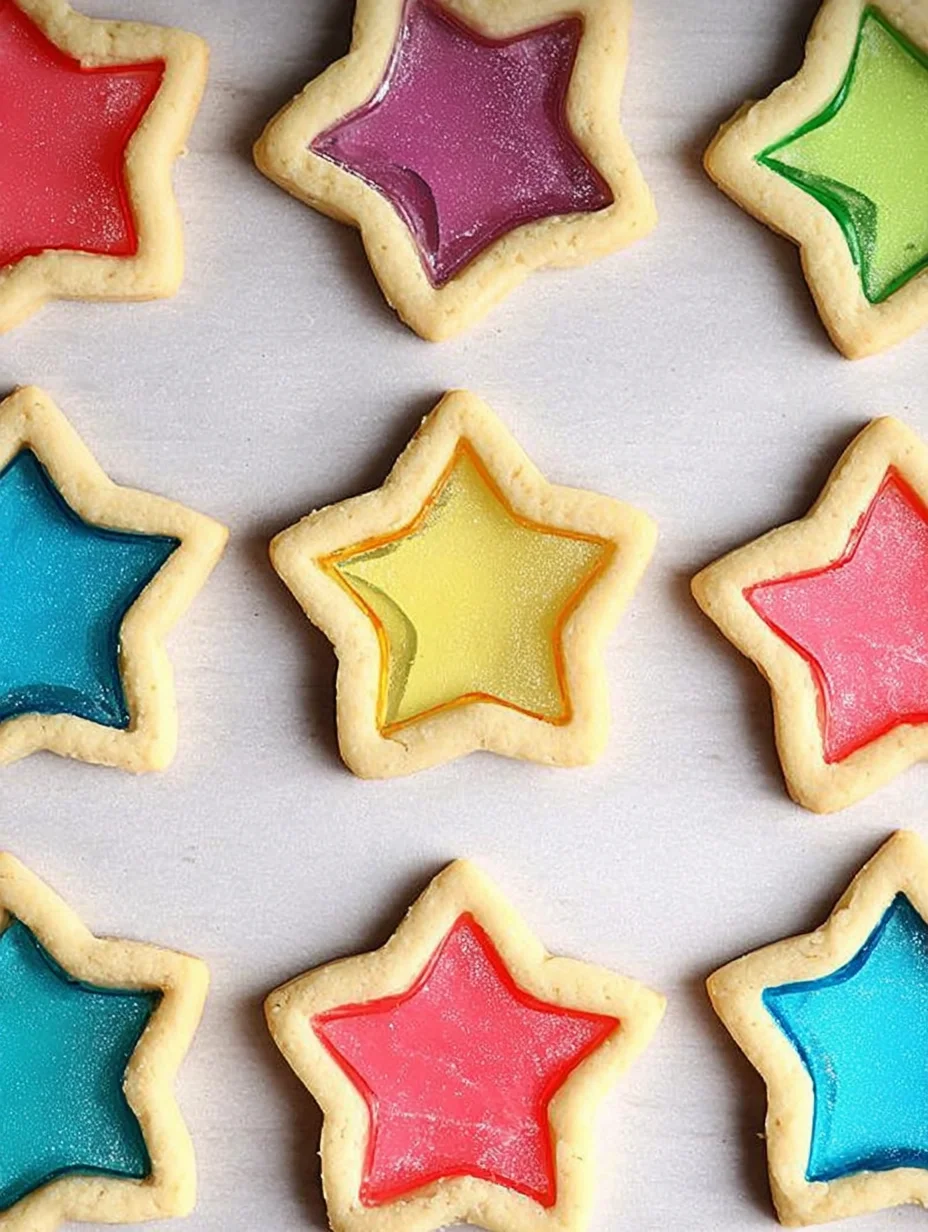
Stained Glass Cookies Recipe

Have you ever watched sunlight stream through a beautiful stained glass window and wished you could create something just as mesmerizing in your own kitchen? That’s exactly what inspired me to dive into making Stained Glass Cookies, those enchanting treats where colorful candy melts into jewel-like centers, turning simple dough into edible art. I’ve always loved baking cookies that double as eye candy, and these Stained Glass Cookies have become a holiday favorite in my home—perfect for gifting or dazzling guests at parties.
The first time I tried Stained Glass Cookies, I was amazed at how straightforward they are to prepare, yet they look so impressive. With just a few basic ingredients and some crushed hard candies, you can whip up a batch that sparkles with flavor and color. In my experience, sharing these homemade Stained Glass Cookies brings out smiles and “wows” every time, making any gathering feel special. If you’re ready to add a touch of whimsy to your baking routine, stick around—I’m excited to walk you through my go-to recipe for Stained Glass Cookies that never fails to delight.
Key Takeaways:
- Stained Glass Cookies create a stunning visual effect with melted candy centers that mimic colorful glass panels.
- Prep and bake in under an hour for quick, crowd-pleasing treats without much hassle.
- These cookies burst with sweet, buttery flavor enhanced by vibrant candy hues.
- Chill the dough briefly for crisp edges and perfect shapes every time.
- Store Stained Glass Cookies in an airtight container for up to a week to keep them fresh and crunchy.
Why You’ll Adore This Stained Glass Cookies
Visually Stunning Presentation: Imagine pulling out cookies that look like tiny works of art—the melted candy in the centers of your Stained Glass Cookies glows like stained glass under light. It’s a showstopper for parties or holidays, and I’ve seen kids and adults alike ooh and aah over them. The best part? They taste as good as they look, with a satisfying crunch around the chewy candy.
Grab This Chef Knife Now - Almost Gone!

- Stays Razor-Sharp: Ice-hardened blade keeps its edge longer than ordinary knives
- Superior Grip Control: Unique finger hole design gives you perfect balance and safety
- Built to Last a Lifetime: Premium stainless steel blade with elegant beech wood handle
- ✓ Finally, a knife that stays sharp and feels comfortable in my hand
- ✓ Professional quality without the premium price tag
- ✓ Makes meal prep faster and more enjoyable
⏰ Only a few items left in stock - order soon
Easy for All Skill Levels: Even if you’re new to baking, these Stained Glass Cookies come together with simple steps that feel more like crafting than cooking. I love how forgiving the recipe is— no fancy equipment needed, just your oven and a bit of patience. You’ll feel like a pro when you see the colors swirl just right.
Customizable Colors and Flavors: Tailor your Stained Glass Cookies to any occasion by choosing different hard candies for the windows. From red and green for Christmas to pastels for spring, the options are endless and fun. In my kitchen, we’ve experimented with everything from cinnamon to fruit-flavored candies, adding a personal twist every batch.
Perfect for Sharing and Gifting: Nothing beats the joy of handing out homemade treats, and these Stained Glass Cookies package beautifully in tins or bags. They’re not too sweet, making them ideal for cookie swaps or as a thoughtful neighbor gift. Let’s be honest, who wouldn’t love receiving a dozen of these dazzling delights?
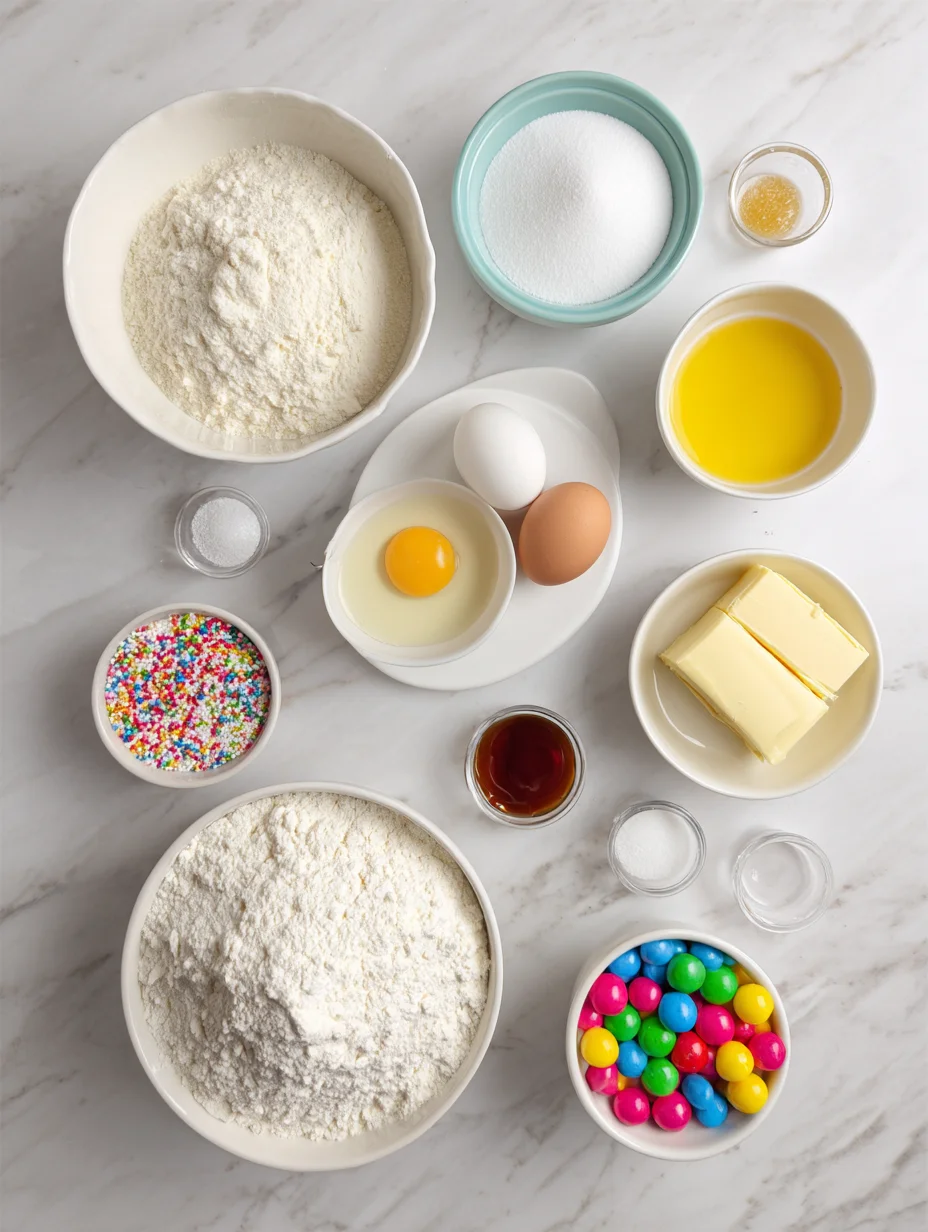
Essential Ingredients for Stained Glass Cookies
Unsalted Butter: The backbone of any great cookie dough, unsalted butter provides that rich, creamy base for your Stained Glass Cookies without overpowering the flavors. It melts smoothly during mixing, ensuring tender results, and I always soften it at room temperature for easy creaming with sugar. In my experience, using high-quality butter elevates the overall taste, making each bite melt-in-your-mouth delicious.
Grab This Kitchen Scale Now — Best Precision Pick!

- Razor-Accurate Every Time: Dual-increment precision down to 0.1g — perfect for baking, meal prep, and portion control with g, oz, ml, and fl'oz modes.
- Smart Removable Bowl Design: Detachable bowl doubles as a protective case for compact storage. Tare function lets you weigh ingredients in any container with zero fuss.
- Built for Everyday Convenience: Auto-zero, tare function, low battery alert, overload indicator, and 2-minute auto-off to extend battery life — all in a sleek stainless steel build.
- ✓ "Perfect for baking — precise, lightweight, and stores easily without wasting counter space"
- ✓ "A game changer! Weighing ingredients is now way more accurate than measuring cups"
- ✓ "Love the 0.1g precision and backlight — best food scale I've owned. Highly recommend!"
⏰ Only a few items left in stock - order soon
All-Purpose Flour: This staple gives structure to the dough, helping your Stained Glass Cookies hold their shape while baking. It’s versatile and easy to find, but sifting it prevents lumps for a silky texture. What I find interesting is how the flour absorbs the butter and eggs just right, creating the perfect canvas for those colorful candy inserts.
Hard Candies: Crushed into colorful bits, these are the magic behind the stained glass effect in your Stained Glass Cookies, melting into translucent windows during baking. Choose fruit-flavored varieties for a burst of taste that complements the buttery dough. I’ve tried different brands, and the clearer ones yield the most vibrant results—don’t skip this for the wow factor!
How to Make Stained Glass Cookies
Prepare the Dough
Start by creaming softened butter and sugar until light and fluffy, which takes about 2-3 minutes with an electric mixer—this step is key for tender Stained Glass Cookies. Beat in the egg and vanilla extract next, scraping down the sides to incorporate everything evenly. Gradually add the flour, salt, and baking powder, mixing just until a soft dough forms; overmixing can toughen it up, so I stop as soon as it comes together. Wrap the dough in plastic and chill for 30 minutes to make it easier to roll out later.
Cut and Fill the Shapes
Preheat your oven to 350°F and line baking sheets with parchment for easy cleanup. On a floured surface, roll the chilled dough to about 1/4-inch thickness, then use cookie cutters to make shapes like stars or hearts—the fun part begins here. For each cookie, cut a smaller shape in the center to create the “window,” fill it with crushed hard candies, and place on the sheet. As you arrange them, notice the dough’s subtle scent of vanilla wafting up; space them 2 inches apart since they’ll spread a bit, and bake for 8-10 minutes until edges are golden.
Bake and Cool
Watch closely as the candies melt into glassy pools in your Stained Glass Cookies—it’s mesmerizing and happens quickly in the hot oven. Once done, let them cool on the sheet for 5 minutes before transferring to a wire rack; this prevents breakage while the centers harden. In my experience, the aroma of baked sugar and butter fills the kitchen, building anticipation. Once fully cooled, your Stained Glass Cookies are ready to admire and enjoy, with that perfect contrast of crisp edges and shiny interiors.
Ingredients
- 1/2 cup (1 stick) unsalted butter, softened
- 1/2 cup granulated sugar
- 1 large egg
- 1 teaspoon vanilla extract
- 1 1/2 cups all-purpose flour
- 1/4 teaspoon salt
- 1/4 teaspoon baking powder
- 20-24 hard candies, assorted colors, crushed
Stained Glass Cookies Instructions
- Cream butter and sugar until fluffy, then beat in egg and vanilla.
- Mix in flour, salt, and baking powder to form dough; chill for 30 minutes.
- Roll dough, cut shapes with center holes, fill with crushed candy.
- Bake at 350°F for 8-10 minutes until edges are golden.
- Cool on sheet, then transfer to rack to harden.
Pro Tips for the Best Stained Glass Cookies
Chill Thoroughly: Always chill your dough to prevent spreading, ensuring your Stained Glass Cookies keep their intricate shapes intact.
Crush Candies Finely: Use a food processor for even pieces that melt uniformly, avoiding lumps in the baked results.
Cool Completely: Let the cookies cool fully before handling to allow the candy centers to set firmly without cracking.
You Must Know
- Stained Glass Cookies are best baked on parchment to prevent sticking from the melting candy.
- Hard candies must be crushed small enough to fit the cutouts without overflowing.
- These cookies aren’t ideal for freezing before baking due to the candy; freeze baked ones instead.
- Adjust baking time based on oven—thinner cookies bake faster to avoid over-browning.
How to Store Stained Glass Cookies
To keep your Stained Glass Cookies fresh, store them in an airtight container at room temperature for up to one week; the candy centers stay shiny and the dough remains crisp. For longer storage, layer them with parchment paper in the fridge for up to two weeks, though humidity might soften the edges slightly. If reheating, a quick 5-minute warm-up in a low oven revives the just-baked texture without melting the glass again.
Customizing Your Stained Glass Cookies
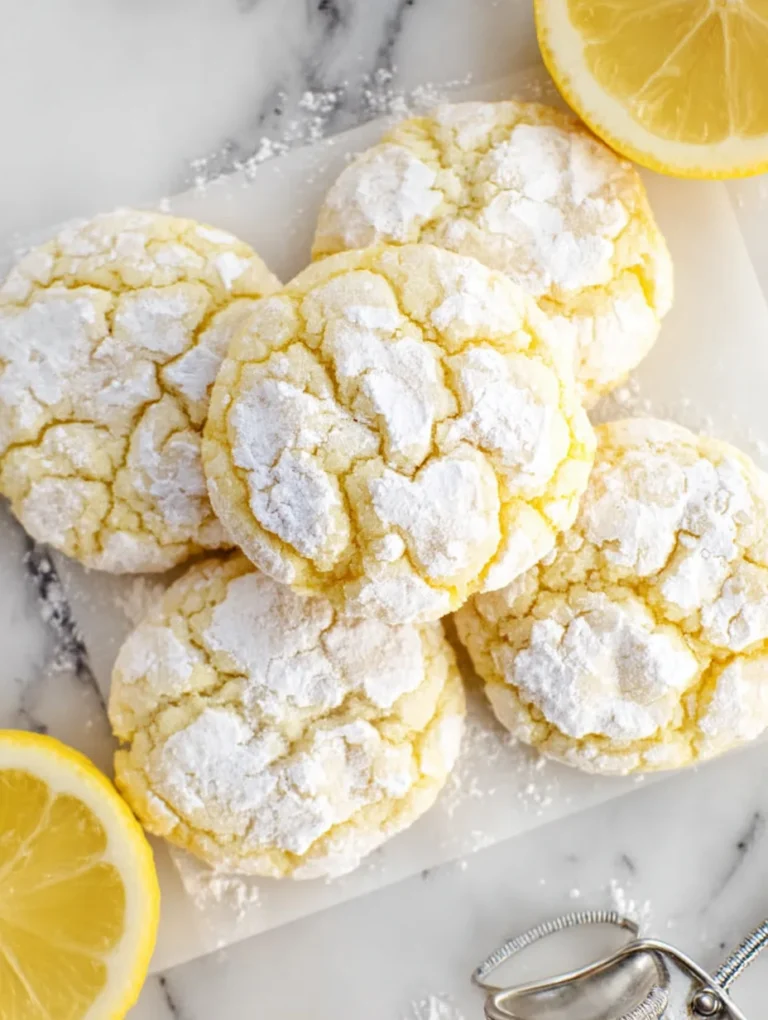
Feel free to swap in gluten-free flour for a dietary-friendly version of your Stained Glass Cookies, or add almond extract for a nutty twist on the vanilla base. For spice lovers, incorporate cinnamon into the dough to complement fruit candies. If you’re looking for more inspiration, check out this lemon crinkle cookies recipe for ideas on flavor variations that pair well with colorful treats.
What to Serve with Stained Glass Cookies
Pair these vibrant cookies with a hot cup of herbal tea or coffee to balance their sweetness—chamomile works especially well for a calming contrast. For a dessert spread, serve alongside fresh fruit like berries or a light fruit salad to enhance the colors. If you’re hosting, add some soft cheeses or nuts on a platter; the crunch of Stained Glass Cookies complements creamy elements beautifully. Don’t forget a glass of milk for the classic cookie dip!

Stained Glass Cookies Recipe
These stained glass cookies are so pretty and they're REALLY EASY to make. Impress your guests with these beautiful AND tasty sugar cookies!
Timing
Recipe Details
Ingredients
- 01 1 cup Sugar
- 02 1/2 teaspoon Salt
- 03 1 Tablespoon Vanilla extract
- 04 1 Egg (large)
- 05 3/4 cup Butter (room temperature)
- 06 2-1/2 cups Flour (all purpose)
- 07 16 Jolly ranchers
Instructions
Gather your cookie ingredients and supplies.
Add the sugar, salt, vanilla, egg, and room temperature butter to a mixing bowl.
Combine the ingredients in a stand mixer or with a hand mixer.
Add the all purpose flour and mix until the dough starts to clump together.
Transfer the dough to your working surface and knead briefly.
Cover your dough with plastic wrap and chill in the refrigerator for 1 hour.
Unwrap two jolly ranchers and place them in a plastic baggie.
Use a hammer or meat mallet to crush the jolly ranchers into very small pieces. Powder is okay as well, but try and get rid of any large chunks. Repeat with other jolly rancher colours. Two jolly ranchers will fill 3 - 4 cookies, depending on your cut out size.
Add flour to your working surface. Place the dough on top and add a bit more flour on top of the dough.
Roll out the dough until it's just over 1/4 inch thick.
Use a cookie cutter to cut out star shapes, or whatever shape you'd like!
Place the cookies on a parchment lined baking tray. You can also use a silicone mat, but you need to cover your baking sheet with something to stop the candy from sticking.
Cut out the centers of the cookies with a smaller cookie cutter of a similar shape.
Fill the center of the cookies with the crushed candies. Make sure they don't overflow; just add enough to cover the hole. Try and remove any pieces that fall on the top of the cookies prior to baking.
Preheat your oven to 350F and bake the cookies for 12 minutes. Allow the cookies to cool on the tray for 20 - 30 minutes, until the candy center has hardened.
Your stained glass cookies are complete!
FILED UNDER:
NUTRITION FACTS (PER SERVING)
Nutrition information is calculated using an ingredient database and should be considered an estimate. In cases where multiple ingredient alternatives are given, the first listed is calculated for nutrition. Garnishes and optional ingredients are not included.
Frequently Asked Questions About Stained Glass Cookies
Can I make Stained Glass Cookies ahead of time?
Absolutely, you can prepare the dough up to two days in advance and store it chilled, or bake the cookies a day early. Just let the dough soften slightly before rolling to make cutting easier. This makes Stained Glass Cookies ideal for holiday prep without last-minute stress.
How long does Stained Glass Cookies last in the fridge?
Your Stained Glass Cookies will stay fresh in the fridge for up to two weeks when sealed properly. The candy centers hold up well, but the dough might soften over time. For the best texture, bring them to room temperature before serving.
Are Stained Glass Cookies suitable for kids?
Yes, they’re fun and safe for kids to help make, as long as an adult handles the oven and hot candies. The crushing step is a great activity, and they love seeing the colors melt. Just supervise to avoid any sharp edges from cutters.
Can I use regular sugar cookies for Stained Glass Cookies?
This recipe is tailored for Stained Glass Cookies with a sturdy dough that holds the candy well, but you can adapt a basic sugar cookie base. Ensure it chills well to prevent spreading. For a tried-and-true version, stick to these proportions in your Stained Glass Cookies.
What if the candy doesn’t melt completely?
If the candy in your Stained Glass Cookies seems under-melted, bake for an extra 1-2 minutes, but watch closely to avoid burning the edges. Finer crushing helps too. It’s rare, but ovens vary, so check midway.
How do I prevent Stained Glass Cookies from sticking?
Use parchment paper or silicone mats on your baking sheets—the melting candy can be sticky. Let them cool fully on the sheet before moving. This keeps your Stained Glass Cookies intact and easy to handle.
Can Stained Glass Cookies be frozen?
Baked Stained Glass Cookies freeze beautifully for up to a month in an airtight bag, layered with parchment. Thaw at room temperature to avoid condensation softening them. It’s a great way to have treats ready for unexpected guests.
Are there vegan options for Stained Glass Cookies?
Yes, substitute vegan butter, a flax egg, and plant-based hard candies to make them vegan. The dough works just as well, yielding delicious Stained Glass Cookies. Test a small batch first for texture adjustments.
Final Thoughts
From the first colorful crunch to the last sparkling bite, these Stained Glass Cookies have a way of brightening any day, just like a window catching the light. I’ve shared this recipe with friends and family, and it always sparks joy and conversation around the table. Give it a try yourself—you won’t believe how easy it is to create something so beautiful and tasty; your kitchen adventures just got a whole lot more fun!